Liferay Login Screenlet - DXP
SCREENLETS IN LIFERAY SCREENS FOR ANDROID
Liferay Screens for Android contains several Screenlets that you can use in your Android apps. This section contains the reference documentation for each. If you’re looking for instructions on using Screens, see the Screens tutorials. The Screens tutorials contain instructions on using Screenlets and using views in Screenlets. Each Screenlet reference document here lists the Screenlet’s features, compatibility, its module (if any), available Views, attributes, listener methods, and more. The available Screenlets are listed here with links to their reference documents:
- Login Screenlet: Signs users in to a Liferay instance.
- Sign Up Screenlet: Registers new users in a Liferay instance.
- Forgot Password Screenlet: Sends emails containing a new password or password reset link to users.
- User Portrait Screenlet: Show the user’s portrait picture.
- DDL Form Screenlet: Presents dynamic forms to be filled out by users and submitted back to the server.
- DDL List Screenlet: Shows a list of records based on a pre-existing DDL in a Liferay instance.
- Asset List Screenlet: Shows a list of assets managed by Liferay’s Asset Framework. This includes web content, blog entries, documents, users, and more.
- Web Content Display Screenlet: Shows the web content’s HTML or structured content. This Screenlet uses the features available in Web Content Management.
- Web Content List Screenlet: Shows a list of web contents from a folder, usually based on a pre-existing
DDMStructure. - Image Gallery Screenlet: Shows a list of images from a folder. This Screenlet also lets users upload and delete images.
- Rating Screenlet: Shows the rating for an asset. This Screenlet also lets the user update or delete the rating.
- Comment List Screenlet: Shows a list of comments for an asset.
- Comment Display Screenlet: Shows a single comment for an asset.
- Comment Add Screenlet: Lets the user comment on an asset.
- Asset Display Screenlet: Displays an asset. Currently, this Screenlet can display Documents and Media Library files (
DLFileEntryentities), blogs articles (BlogsEntryentities), and web content articles (WebContententities). You can also use it to display custom assets. - Blogs Entry Display Screenlet: Shows a single blog entry.
- Image Display Screenlet: Shows a single image file from a Liferay instance’s Documents and Media Library.
- Video Display Screenlet: Shows a single video file from a Liferay instance’s Documents and Media Library.
- Audio Display Screenlet: Shows a single audio file from a Liferay instance’s Documents and Media Library.
- PDF Display Screenlet: Shows a single PDF file from a Liferay instance’s Documents and Media Library.
- Web Screenlet: Displays any web page. You can also customize the web page through injection of local and remote JavaScript and CSS files.
Let we go one by one Screenlet with example :
Login Screenlet: Signs users in to a Liferay instance.
The Login Screenlet authenticates portal users in your iOS app. The following authentication methods are supported:
- Basic: uses user login and password according to HTTP Basic Access Authentication specification. Depending on the authentication method used by your Liferay instance, you need to provide the user’s email address, screen name, or user ID. You also need to provide the user’s password.
- OAuth: implements the OAuth 1.0a specification.
- Cookie: uses a cookie to log in. This lets you access documents and images in the portal’s document library without the guest view permission in the portal. The other authentication types require this permission to access such files.
When a user successfully authenticates, their attributes are retrieved for use in the app. You can use the
SessionContext class to get the current user’s attributes.
Note that user credentials and attributes can be stored securely in the keychain (see the 
saveCredentialsattribute). Stored user credentials can be used to automatically log the user in to subsequent sessions. To do this, you can use the method SessionContext.loadStoredCredentials() method.
1.Create new project-projectname-empty screenlet.
2.In build.gradle(Module)
add Liferay implementation code:
implementation 'com.liferay.mobile:liferay-screens:+'
implementation 'com.liferay.mobile:liferay-material-viewset:+'
implementation 'com.liferay.mobile:liferay-westeros-viewset:+'
such as

Now refersh by clicking "Sync-now",
For few will get error such as change the minSdkVersion 15 to 16.
In that case just change minSdkVersion 16.
2. Very important step where you need to configure liferay server .
create a new xml "server-context.xml" inside res/value/server-context.xml
copy paste below code:
<?xml version="1.0" encoding="utf-8"?><resources>
!-- Change these values for your Liferay Portal installation -->
<string name="liferay_server">http://ip-address:port no</string>
Ex: http://10.0.2.2:8080
<integer name="liferay_company_id">companyid</integer>
<integer name="liferay_group_id">groupid</integer>
<integer name="liferay_portal_version">70</integer>
</resources>

3.Modify the "activity-main.xml" inside res/layout/activity-main.xml
add the below entry
xmlns:liferay="http://schemas.android.com/apk/res-auto"
<com.liferay.mobile.screens.auth.login.LoginScreenlet
android:id="@+id/login_screenlet"
android:layout_width="match_parent"
android:layout_height="wrap_content"
liferay:basicAuthMethod="email"
liferay:credentialsStorage="auto"
liferay:layoutId="@layout/login_material"/>

Layout Id can be provided with 3 options :
@layout/login_material
@layout/login_westeros
@layout/login_default
Now Go to controller & add below lines
1. public class MainActivity extends AppCompatActivity implements LoginListener
2.
public class MainActivity extends AppCompatActivity implements LoginListener {

    @Override    protected void onCreate(Bundle savedInstanceState) {
        super.onCreate(savedInstanceState);
        setContentView(R.layout.activity_main);

        LoginScreenlet loginScreenlet = (LoginScreenlet) findViewById(R.id.login_screenlet);

        loginScreenlet.setListener(this);
    }

    @Override    public void onLoginSuccess(User user) {
    System.out.print(user.getEmail() + " "+ user.getScreenName() + " " + user.getValues());
        startActivity(new Intent(MainActivity.this, ActivityOne.class));
    }

    @Override    public void onLoginFailure(Exception e) {

        Toast.makeText(MainActivity.this, "Login failed!", Toast.LENGTH_SHORT).show();
    }

    @Override    public void onAuthenticationBrowserShown() {

    }
}
3.Create one new Activity with the name "ActivityOne", so that once you login that page will redirects
ActivityOne controller.
we used loginScreenlet inside onCreate method
      LoginScreenlet loginScreenlet = (LoginScreenlet) findViewById(R.id.login_screenlet);
      loginScreenlet.setListener(this);
OnLoginSuccess method calls startActivity if it finds MainActivity, then
it will transfer controller to ActivityOne.
onLoginFailure method just print faled login message.
Now just run a simulator, you can find mobile view

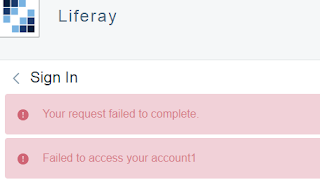
Try to login with Incorrect email & password, It should through failed message !!
Now login with Correct email & password, Login Success ! Happens, & Redirect to Empty Page.
In next blog, Will do DDL form using screenlets.
Comments
Post a Comment